Showing posts with label Retouching. Show all posts

Monday, 27 April 2015

Post Resolution Work

My large A0 print, I am saving for the Free Range exhibition. I have been working on some post resolution work.
As it is highly experimental I am not displaying it for the degree show. I stated earlier, my work is two different chapters of the same book. This work is the sequel to that work.


These are my original scans:


These colour papers are intense. They represent a dystopian nightmare alternative world. The reason for this is the first half of the series, the empty abandoned interiors that I have been stuck in, and the natural outside world that is a painful release from the first half of the series.

--------------------------------------------------------------------------------------------------------------------------


I inverted the scans, and experimented with the levels and colours, they are still very blue but the colours in some really are not far off. I learned the ISO of colour paper is tricky. The ISO of the magenta is somewhere around ISO 25, but the ISO of the blue is 100. I cut out the magenta,, with two magenta filters that cut 2 stops on the recommendation of one of my tutor's Peter Renn, I now feel I should have used blue filters to filter out the Blue and bring it down by several stops to bring it more in line with ISO 25.
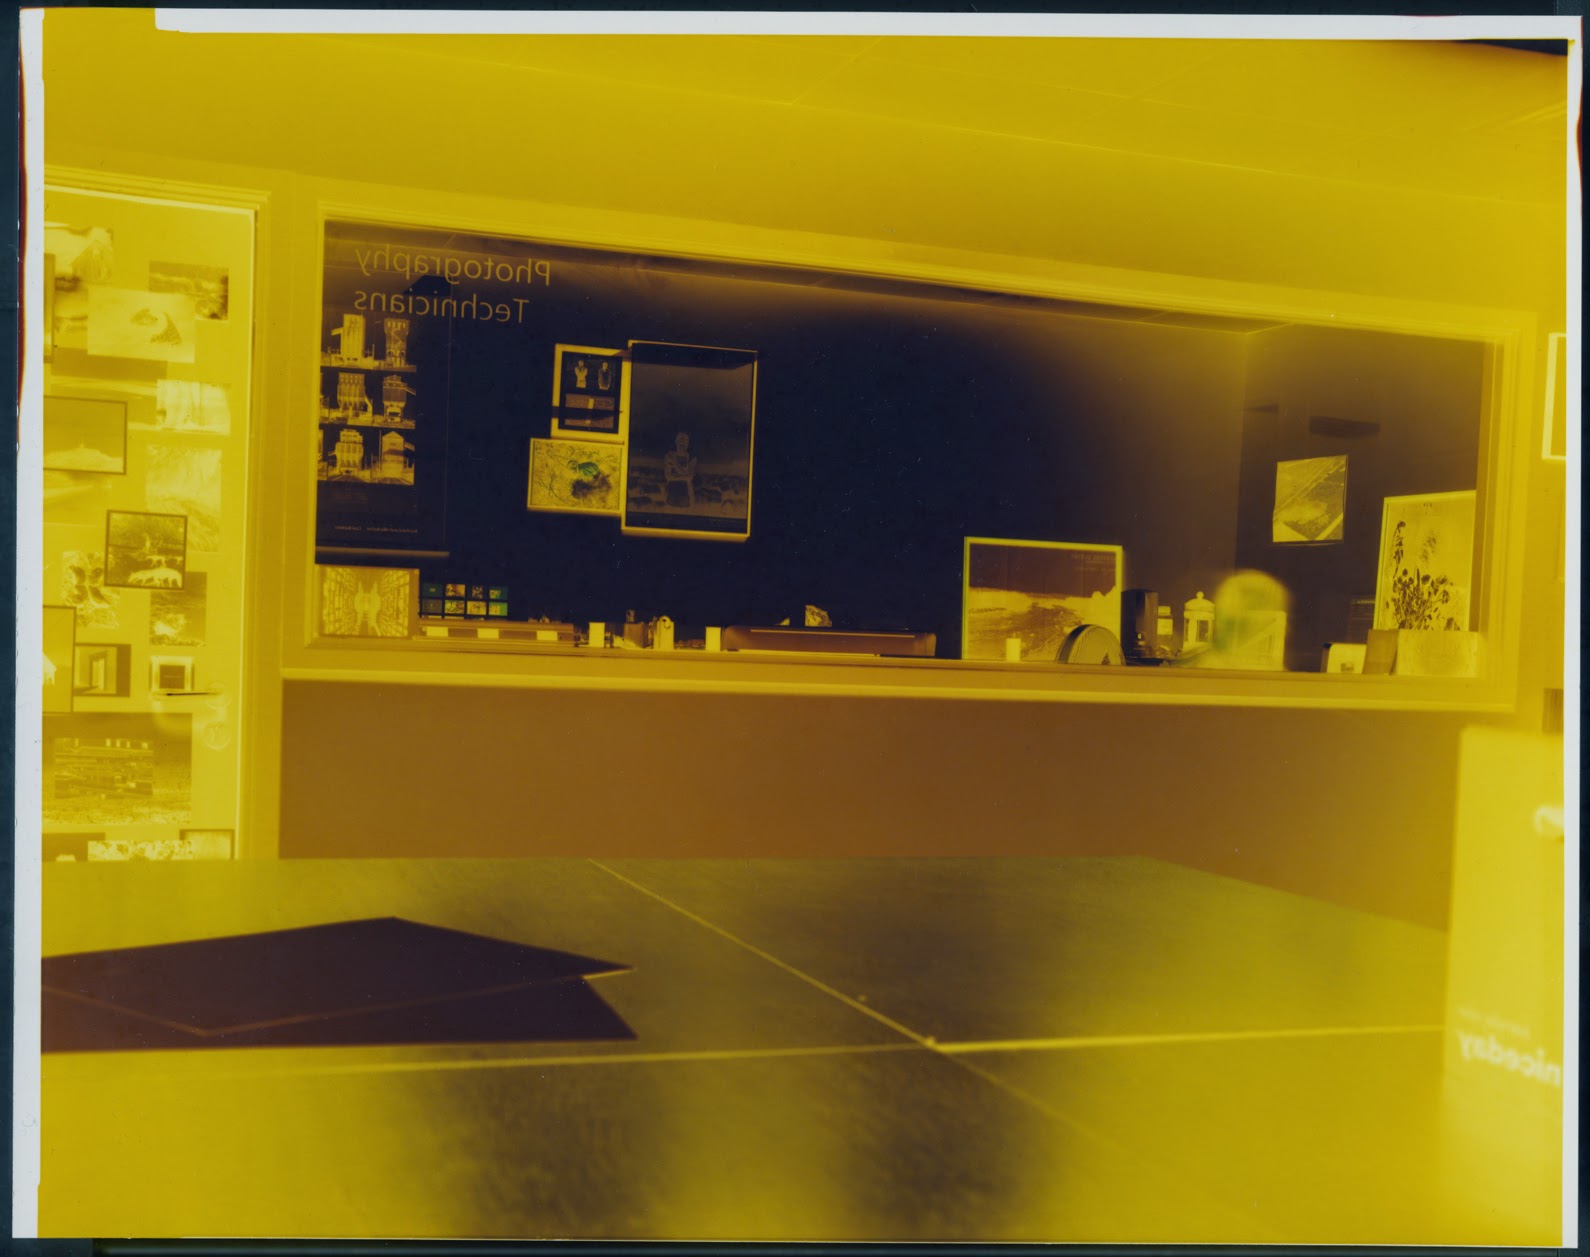
The colours are still quite basic and would need more work to get them to somewhere I might want to display them. However I feel that when the colours are inverted the photographs lose their strange nightmare feel.

--------------------------------------------------------------------------------------------------------------------------

While experimenting with colours I adjusted the midtones in the colour balance adjustment in Photoshop. this was pretty much the first thing that happened, Richard Mosse eat your heart out.

--------------------------------------------------------------------------------------------------------------------------


I retouched these as negatives to retain their nightmare aesthetic. I altered the colours in them though, so each had a strong colour dominating its composition, I think some work really well and accurately display my intentions, but others just dont fit, I feel the some of the series works better in its original negative colours.

Sunday, 26 April 2015

The Show Build and Wall Hang

Show Build

The day came to start the show build. The tutors asked for us to split in groups, I immediately joined the building group, as in college I had done painting walls and I helped with show painting in first year of uni and I know I don't find painting much fun at all. However what with my uncle being a carpenter by trade, I have been around tools and building all manner of things since I were a child.
In the Easter break one room had been built already, and some amount had been done in another. We as a year group hauled many pieces of timber in and quite a few boards. After that, the painting team dispersed to paint the upstairs room that had been built and we started to build boards with timber between them to be put up in the centre of the room.
The next morning we finished that room and until Thursday we built the upstairs room G152. I teamed with my buddy Rich and tasked with building the double boards to go in the centre of the room, while the technicians Paul and Adam put up boards around the walls. It got done apparently ahead of schedule, it was a very sweaty but fun few days, lots of jokes and laughs, it was a good small team to get the build done, had fun but stayed focused on work.
Before the day came when everything was finished being painted, I was ready to hang my work. I helped build another room as I enjoy building stuff and my room was not ready. I guess I could help paint that room, but I felt I would just be someone in the way of people painting.


Wall Hang

I borrowed a few tools from my buddy Ben; hammer, screwdriver, tape measure, they were invaluable. I bought some small assorted nails and many bulldog clips. I chose I wanted to hang my work in this manner when I saw this used in the Photographers gallery (see my post - The Photographers Gallery - Anima & The Widest Prairies).
I learned the best way to hang is at 150cm for good eye level. I used this as a guide, and measured out exactly where I wanted each print to go, I put them all on the floor in front of my space. 
I measured everything out using the tape measure, a spirit level and a ruler. I wrote things in light pencil. I worked out where to hammer each nail into the wall until 5mm was still sticking out of the wall. 
I played with the idea of putting one of my A2 prints in the middle of my A3 prints inspired by when I was looking at Wolfgang Tillmans. I decided against this as there was no reason to do this and it didnt look so nice.
I went back to my original idea, I cropped the white paper around the images so they were neat and hung them all the same, the bulldog clips let the natural paper aesthetic stay there rather than being contained within frames and hidden behind glass or flattened when mounted to card or foam.


This is my final hang, I started to become stressed when hanging this, as once I finished put all the nails in I was asked to help someone, so I became stressed as I just wanted to finish hanging my work. I guess understanding a spirit level and knowing how to use a screwdriver makes me a worthwhile commodity. I wore cotton gloves when handling the prints. They needed some tweaking after being put up just to straighten them out.
This picture was very hard to take, my space is so wide that I had to use an ultra-wide angle lens on a 35mm sensor camera. The picture was so distorted that I had to do a fair amount of lens corrections using manual corrections in Lightroom to fix a bit of horizontal distortion and a ton of vertical distortion, and of course a fair amount of distortion from the wideness of the lens. 

After I finished my hang I went to hep hang other peoples work, The rooms were open till 1945 that night and I did not leave until the caretakers came to boot us out, whats got to be done has got to be done. The next day I pulled some people together to get the rooms hoovered, cleaned of any stray paint left over and swept up any dust that the hoover couldn't get. After all the work I wanted the place to be in the best possible state for review. Even the tiniest things can change someones impressions. I also hoovered the hallways around the Show just to make sure, it might be the cleaners job to hoover floors, but if there is a load of mess photography students made, leaving it for them to clean is taking the piss. Work life has left me with a high standard for cleanliness and those floors were spotless when we finished.

An edit of 10x8s


I retouched these files. I haven't tried to perfect any anomalies in the scanning, however I have brought detail out from the highlights, doing this revealed intense light ray developing marks.

These are starting to reflect a dystopian nightmare. It really has the feeling of the strains of everyday life, without directly showing anything directly mundane. These photographs stand in for my feelings surrounding the subjects discussed, while giving a tantalising glimpse, albeit nervous, uncertain view into a release -
"feelings and emotions towards the passage of time: time moving ever forward, my worries over forging a career after uni, my consideration over the choice to study a Masters degree, my fears, my memories of choices made in the past, the rural wilderness I choose to escape to and my desire to float on down the river and into the horizon."

Each viewer is invited to read these images their own way, as I will not present anything that puts the work in any boundaries that specifically defines what it is about.